Thursday, July 29, 2010

Cornhole game in RocketWorld


This is the Cornhole game Joe Trapani and I created. This is a very fun college game that I thought would go perfect for the yard. What i did was right click on the ground and click create. After that I used the shape that looked like the game board and used the stretch, rotate, and position tabs to make it look like it does now. After that, I used to circular hole shape to create the hole for the bags to go in. You can also see little bags next to each game board that Rich Lapham created.

Volleyball court in RocketWorld


The first picture is the volleyball court that Joe Trapani and I created. We created this by right clicking on the ground in RocketWorld and pressing create. After that we used the cylinders to created the poles, the net and the boarder that surrounds the court. We used to rotate tab, stretch tab, and position tab to manouver each pole into perfect position. After that, we created a volleyball using the circular shape. The picture below shows our creation from high in the sky....You can even see our cornhole game that we created


Final Group Project Plans


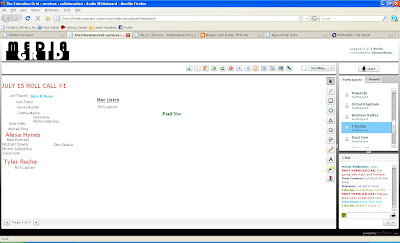
This was the drawn up plan on the audio white board for our group project. The responsibilities that I took on were the yard decoration. I decided to create a volleyball court, a game of Cornhole, and a few trees to decorate the yard. I drew the volleyball net using the line tool.

Tuesday, July 27, 2010

July 27th Roll call #2

My New Rocket!

These are my new rocket made in Rocket world. What i did first is right clicked on the ground and then clicked create. After I did that I chose a cylinder and messed with the X and Y axis. Then I chose the stretch tool to make it bigger, like a rocket. After that I chose the cone shape and all three other cylinder shapes and did the same thing so that it looked exactly how I wanted it. After that I took a screen shot by pressing alt and print screen. Pasted it into paint, and here is the master creation to show all of you followers out there.


July 27th Roll Call


This is a screen shot by using Alt + print screen. Then i pasted into the paint application and saved it.

Thursday, July 22, 2010

Midterm 8


The above picture is the original picture and the one below it is the one that is photoshopped. I used gimpshop to edit this picture. I pretty much just used the smudge tool to clean up all of the lines in my forehead and ears and I blurred the ice cream off my lip with the smudge tool as well. I also did a little work thinning out my eyebrows...

Midterm #7


I used Cuba Gooding Jr. for midterm # 7. I first downloaded the picture and then the logo and imported them into GimpShop. After I resized the logo I copied and pasted it onto Cuba's eyes. After that I selected the text tool and wrote all the things down at the bottem. I saved the picture as a .psd file, but the blogger would not let me upload it saying it didn't recognize the file.

Midterm #4: RocketWorld screen shot


I went onto rocket world, took a screen shot of my avitar by pressing alt and print screen. then went into paint and pasted the picture and saved it. Looks pretty cool right?

Tuesday, July 20, 2010

July 20th Roll Call #2


Roll Call #2 @ 7:55pm

Roll Call for July 20th 2010


for this roll call i pressed alt and print screen. Then i went into paint and pasted the screen shot and uploaded it onto my blog. sweet.

Thursday, July 15, 2010

Assignment #4: July 15th


This was the most tedious thing I made so far on Powerbullet. I had to use all my knowledge and skills to make this one. I did the same things in the previous assignments, only this time I added 2 other pages so it went in a slide show type presentation. Check it out by clicking on the screen shot!!

Assignment #3: July 15th


I chose this picture because it means a lot to me. This is my favorite picture taken when I was playing at Duke. Those are the Cameron Crazies in the background who are all trying to distract me. I chose red white and blue for the gradient because I was feeling extra American. I chose some new animations which I liked.

Assignment #2: July 15th


I put the penguin is as an object. I fooled around with the gradient and chose 4 different seperations: white pink, purple, and light blue. After that I chose the animation for each box that I wanted. I thought it turned out pretty well.

Assignment #1: July 15th


This is the first assignment that I created in Powerbullet. At first I added a rectangle and then added a text box where I wrote my name. After that I chose 3 different colors for the gradient. Then I chose the animation and effect that I enjoyed the most.

July 15th Attendance

Tuesday, July 13, 2010

July 13: Roll Call #2


This is Roll Call #2 screen shot.

Midterm #10: Building a House


This is my house I built out of the basic shapes on Microsoft Word. I filled in the shapes with various colors using Format Auto Shape. At the end, I fooled around with the lines to see what they were all about. I am not sure what i would use these for in the future, but am excited to find out.

Midterm #9


This is the screen shot of me playing with the shapes and lines as well as adding text inside of the shapes. It was pretty easy and fun to do. Also very important to know for future endeavors.

Roll Call #1 for July 13th


This is the first roll call for July 13th....I saved it in paint and saved it as a JPEG.

Midterm #6


For the first part of Midterm #6, I followed all of the directions. I created a new image and then selected transparency. After that, I selected the text box and wrote Understanding and using layers in GIMPShop. Then, I used layers and filled in a new layer with a white layer. Then I downloaded the penguin and pasted it onto my text and anchored it. Then I moved the penguin layer down and erased the New Layer. I thought it looked pretty cool!


First I selected the Xtns tab, then the Script-Fu, then Logos, then Text Circle (at the bottom of the drop down menu). After that, I typed my name in the text box. After that I added a layer. then I copied and pasted my name into the box. Then, I created the animation by using the rotation box starting at a 45 degree angle and then anchored it. I then repeated those steps three times, increasing the angle by 15 degrees everytime to ensure a nice animation. Finally I saved the finished product as an animation and a GIF file, clicked the loop forever tab, and increased delay to 500 milliseconds. Looks kewl huh?

Midterm #5


(Interlaced PNG)


(Progressive JPEG)


The difference between the two files is clear. However, I don't see the choice of the two being a problem because the majority of internet users are browsing with a high speed connection.

Thursday, July 8, 2010

Assignment- Red Eye Image Formats


(PNG)


(GIF)


(JPG)

I completed this assignment just like i did Midterm #3. I opened the .jpg image in Gimpshop and saved the photo's using .GIF and . PNG. I also checked all the necessary boxes during the saving process, as directed. I can tell a little difference between the .PNG photo and the others. The .PNG image seems a lot sharper than the others and more distinct. Also, the .GIF photo looks like it is a lot poorer quality than the other two.


Midterm #3: Saving images in web formats


(JPG)


(GIF)


(PNG)

First off, I downloaded the Ball.tif image to my desktop. After that, I saved each one of them and then changed the .tif to either a .jpg, .gif, or .png. I then followed the directions of which boxes to click and finally used the paintbrush to write my name at the end.

Midterm #2: Adding a caption


After I downloaded the picture of Seamus the cat, I Selected the Upper region of the picture with my "Select region" tool. After I did that, I filled it in with the "Fill in with BG color" tab located in that edit tab. Then, I selected the text button and wrote a message that I thought the cat was thinking. I changed the font size to 25 using the tool bar and I also chose for my text to be blue.

Midterm #1: Curing Red Eye

The first thing I did to cure this beautiful woman's red eye was to use the eye dropped to get a sample of her original eye color that outlined her red eye. After I got that, I zoomed in 200% to make it easy to paint over her red eye. I then selected the paintbrush tool and filled in her red eye. At the end, I used the paintbrush tool again to write my name over her gorgeous face.

Tuesday, July 6, 2010

Face Lift


For this face lift, I used a picture of my coach. I edited the picture with Gimp Shop. I took away the wrinkles under his eyes and next to his chin with the smudge tool and also used the dodge and burn tools to get the right effects. Lastly, I used the paintbrush tool to write my name.

Savage Beast


This guy, Rich Lapham, revolutionized the game of football. He is a 5th year senior as well as a great friend of mine here at Boston College. He is an animal! We are going to be starting a Moped gang around the city of Chestnut Hill. Any ideas for a sweet name??

My favorite people in the world


I chose the New World Order. They are the best wrestling group ever assembled. My favorite is Hulk Hogan because he was a beast. They had Razor Ramon in their group. He was a great wrestler as well.

Hello!

This is my first blog. I never thought I would have had a blog before, but now I do. I am really excited!!!! I hope everyone follows my blogs!!!!